Article
How To Organize Your Kitchen Sink Area So It Stays Clean After The Reset
Quick Answer
How To Organize Your Kitchen Sink Area So It Stays Clean After The Reset: quick answer
The kitchen sink is not just a place where dishes get rinsed. It is a work zone. Food scraps pass through it. Hands get washed there. Sponges, brushes,...
- Topic: Kitchen Organization.
- Related product category: home-garden.
- This article uses one relevant product insertion and keeps the main answer in the article copy.
Why The Sink Area Gets Messy So Fast
The kitchen sink is not just a place where dishes get rinsed. It is a work zone. Food scraps pass through it. Hands get washed there. Sponges, brushes, dish soap, hand soap, towels, bottle brushes, gloves, drain stoppers, and cleaning sprays all drift toward it because the sink is the easiest place to leave anything wet. That is why the area can look messy even when the rest of the kitchen is reasonably clean.
Most sink clutter is not caused by owning too many things. It is caused by not having clear homes for the few things that are used every day. A sponge gets left on the counter because there is no dry place for it. A dish brush leans against the faucet because the holder is full. Soap sits in the original bottle because nobody wants to refill a dispenser. A towel stays damp because it has no place to hang. The result is a small cluster of tools that never fully dry and never fully disappear from the counter.
The fix is not to buy a large organizer and stuff everything into it. The fix is to design the sink area around flow. Dirty items come in. Water drains away. Cleaning tools dry between uses. Soap is easy to pump with one hand. Sponges and brushes return to the same place every time. Backup supplies stay under the sink, not around the faucet. The counter stays mostly open because the sink area is treated like a workstation rather than a dumping ground.
This guide walks through a practical sink reset that can be done in one focused session, then maintained with a short daily habit. The goal is not a picture-perfect kitchen that only works for a photo. The goal is a sink area that works on a normal weeknight when there are pans to rinse, vegetables to wash, lunch containers to clean, and somebody else in the house asking where the sponge went.
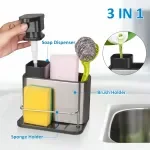
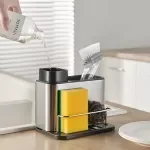
The matched product for this article is the 3-in-1 Stainless Steel Kitchen Sink Organizer with Soap Dispenser, Sponge, and Brush Holder (#1790715). It fits the article because it solves the central sink-area problem: dish soap, sponge, and brush need to be together, upright, easy to reach, and able to drain. The article still works without that exact product, but a compact organizer with a pump, sponge tray, and brush holder gives the system a physical center.
Step 1: Remove Everything Before You Decide What Belongs
Do not start by sliding items around the sink. That usually creates a neater version of the same problem. Start by removing every object from the sink ledge, the counter next to the sink, the faucet area, the window ledge if you have one, and the front edge where towels often collect.
Put everything on a table or a dry section of counter. Include dish soap, hand soap, sponges, scrub pads, bottle brushes, drain covers, cleaning sprays, rubber gloves, dish towels, drying mats, loose caps, extra soap bottles, old brushes, and anything else that has been living nearby. Seeing the whole pile matters because sink clutter hides in plain sight. A kitchen can feel normal with twelve items around the sink until they are grouped together and you realize only four of them are used daily.
Now sort the pile into four groups: daily tools, occasional tools, backup supplies, and trash. Daily tools are the things you use almost every day at the sink. For most homes, that means dish soap, one sponge or scrub pad, one dish brush, one hand soap if it belongs there, and one towel. Occasional tools may include gloves, a bottle brush, a steel-safe scrubber, drain cleaner, sink stopper, or a specialty brush. Backup supplies include extra sponges, unopened soap, dishwasher pods, refill bottles, and spare towels. Trash includes worn-out sponges, cracked dispensers, brushes with bent or grimy bristles, empty bottles, and cleaning products you do not use.
Be strict. The sink area is valuable because it is active counter space. Anything that is not used at the sink every day should earn its place somewhere else. Backup soap does not need to sit next to the faucet. Extra sponges do not need to crowd the counter. The dish rack does not need to stay out all day if it is used only after dinner. The more items you allow to live around the sink, the more quickly the reset collapses.
This first step also gives you a chance to clean the surface properly. With everything removed, wipe the faucet base, sink rim, backsplash, counter seam, and the area where bottles usually sit. These spots often have rings of soap residue or fine grit that never get cleaned because objects are always in the way. Start with a clean surface before putting anything back.
Step 2: Choose The Daily Sink Kit
The sink kit should be small enough to maintain without thinking. A good daily kit usually includes one dish soap pump, one sponge or scrub pad, one dish brush, and one towel or cloth. Some homes also need hand soap at the kitchen sink, especially if the sink is used after handling groceries, pet bowls, or raw ingredients. If hand soap is included, give it its own place so it does not crowd dish soap.
The mistake is keeping every possible tool in the active zone. Three sponges do not make the sink cleaner. They create confusion about which one is cleanest. Two dish soaps make the area look busy and leave more sticky residue. Multiple brushes make drying harder. If a tool is used rarely, put it under the sink or in a nearby drawer.
Choose one sponge or scrub pad that matches how you actually clean. If you mostly rinse plates and wipe counters, a simple sponge or soft scrub pad is enough. If you cook with pans that need more work, keep one dish brush available. If you wash narrow bottles daily, a bottle brush may deserve a spot, but if it is used once a week, store it below.
The dish towel also needs a decision. A towel draped over the faucet or tossed beside the sink keeps the area visually messy and stays damp longer. If possible, hang it on a rail, hook, oven handle, or under-sink cabinet door. A damp cloth or towel should be able to dry with air around it.
When the daily kit is clear, the rest of the organization becomes easier. You are no longer trying to make room for every kitchen cleaning item. You are building a clean landing place for a few high-use tools.
Step 3: Give Wet Tools A Draining Home
Wet tools are the main reason the sink area becomes unpleasant. A sponge left flat on the counter stays wet underneath. A scrub brush dropped in a cup can sit in its own water. A soap bottle with a wet base leaves a ring. Even when the counter is technically wiped, the area still feels damp and cluttered.
The solution is elevation and drainage. Sponges and brushes should not sit in puddles. They should rest in a holder that allows water to move away and air to circulate. A tray without drainage may look organized for one day, but it becomes another wet surface to clean. A holder with drainage is better because it separates the tool from standing water.
This is where the 3-in-1 Stainless Steel Kitchen Sink Organizer with Soap Dispenser, Sponge, and Brush Holder (#1790715) fits naturally. Its useful feature is not decoration. It combines the main wet-zone items into one compact station: soap pump, sponge area, and brush holder. That means the tools used together are stored together, but not piled on top of each other.
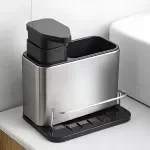
Stainless steel is a strong material choice for this use because it can be wiped clean and does not absorb moisture. The compact footprint also matters. A sink organizer should reduce visual noise, not become a large counter object. If the holder is too big, people start adding extra items to it, and it becomes another clutter tray.
Place the organizer where the person washing dishes naturally reaches. If you wash with your right hand, the right side of the sink may feel more natural. If the left side is where dirty dishes land, the organizer may need to live on the opposite side to keep the landing zone clear. The best position is the one that keeps tools reachable without blocking food prep, rinsing, or dish stacking.
After choosing the position, watch it for a few days. If people keep moving the sponge somewhere else, the holder may be in the wrong place. Organization that fights natural movement will not last. Adjust the location until returning the sponge and brush feels automatic.
Step 4: Separate Dish Soap, Hand Soap, And Backup Refills
Soap is one of the biggest sources of sink clutter because it often arrives in disposable bottles that are different sizes, different colors, and easy to leave half empty. A dedicated pump can make the sink area calmer, but only if the soap system is simple.
Dish soap should be close to the sponge or brush. It needs to be reachable with wet hands and ideally usable with one hand. If dish soap is built into the organizer, that removes one loose bottle from the counter. The pump should be easy to press without tipping the whole station. Refill it before it is completely empty so nobody pulls out a backup bottle and leaves both on the counter.
Hand soap should be treated separately. If you keep it at the kitchen sink, place it on the other side of the faucet or in a small defined spot. The separation helps people know which pump is for dishes and which is for hands. If the sink area is very small, consider whether hand soap truly needs to be on the counter or whether one multipurpose hand-safe soap setup is enough for your household.
Backup refills should never live in the active sink zone. Keep them under the sink, in a pantry bin, or in a cleaning supply cabinet. If a refill bottle sits by the faucet, it becomes part of the daily clutter even though it is not being used daily. The same applies to extra sponges and brushes. Keep one active item out. Store the rest.
If you use dishwasher pods, sink cleaner, disposal cleaner, gloves, or specialty sprays, group them below the sink in bins. The active counter should hold what your hands need during normal dishwashing, not everything related to cleaning.
This one rule makes a large difference: the counter is for active tools; the cabinet is for supply storage. Once the sink area stops doubling as a storage shelf, it becomes easier to keep clean.
Step 5: Design Around The Way Dishes Actually Move
A sink organization plan should match the path dishes take through the kitchen. If the plan ignores that path, clutter returns immediately.
Look at your sink during a normal dinner cleanup. Where do dirty plates land before they are rinsed? Where does the cutting board go? Where do clean dishes dry? Where do pots sit when they need soaking? Where does the sponge end up when someone is moving quickly? These habits show you where zones should be.
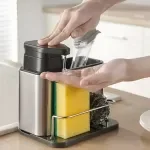
Most sinks need three clear zones: a dirty landing zone, a wet tool zone, and a drying zone. The dirty landing zone is where dishes wait briefly before rinsing or loading. Keep this area as open as possible. Do not put the soap pump, brush holder, or decorative items in the exact spot where plates naturally land. The wet tool zone is where the organizer, sponge, and brush live. The drying zone is where clean items sit temporarily.
If your counter is small, the drying zone may need to be flexible. A foldable drying mat, roll-up rack, or compact dish rack can come out when needed and be stored when dry. Keeping a large dish rack permanently beside a small sink can make the whole area feel crowded, even if the rack is useful for one part of the day.
If your household hand-washes many dishes, a permanent drying rack may be necessary. In that case, make the rack the drying zone and keep the organizer on the opposite side. Avoid placing wet tools inside the drying rack because then dirty sponge water mixes with clean dishes.
The best layout is not always symmetrical or visually centered. It is the layout that prevents tools, dirty dishes, and clean drying items from competing for the same few inches.
Step 6: Use Under-Sink Storage For Backups, Not Daily Confusion
The cabinet under the sink often becomes a dark pile of supplies: trash bags, dishwasher pods, sprays, gloves, old sponges, plumbing parts, and mystery bottles. If that area is chaotic, sink clutter increases because nobody wants to dig underneath for anything. Items stay on the counter because the cabinet is unpleasant to use.
Start by removing everything from under the sink. Wipe the cabinet floor and check for leaks or moisture. Do not organize around a leak. If the base is damp, swollen, or smells musty, handle that before adding bins.
Use simple categories: dishwashing supplies, cleaning sprays, trash bags, specialty tools, and backups. A small bin for extra sponges and brush heads prevents duplicates from spreading. Another bin for soap refills keeps bottles upright. If you use dishwasher pods, keep them in a container that is easy to pull forward.
Do not overfill the cabinet. Leave room around plumbing so you can see if something leaks. Avoid stacking heavy items in a way that makes daily supplies hard to reach. If you cannot pull out the sponge-refill bin without moving six bottles, the system will fail.
Door storage can help if used lightly. A small hook for gloves, a towel, or a brush can free shelf space. A slim door basket can hold trash bags or small supplies. But do not hang so much on the door that it bangs into plumbing or makes the cabinet hard to close.
The under-sink area supports the counter. Its job is to keep backup supplies close but not visible. When it works, the sink area can stay minimal without becoming inconvenient.
Step 7: Add Vertical Storage Only Where It Solves A Real Problem
Vertical storage can be helpful, but it should not become decoration pretending to be organization. Hooks, rails, adhesive holders, and cabinet-door organizers work when they move a specific item off the counter and into a place where it dries or stays accessible.
Good candidates for vertical storage include rubber gloves, a dish towel, a bottle brush, a small scrub brush, or a lightweight cleaning cloth. Poor candidates include heavy soap bottles, rarely used gadgets, or anything that drips onto the floor. If an item needs to drain, make sure the wall location can handle water safely.
The inside of the under-sink door is often better than the backsplash for items that do not need to be seen. Gloves can hang there. A small brush can hang there. Trash bags can be stored there. The backsplash or side of a cabinet should be reserved for items you use often enough to justify visual space.
Adhesive hooks are useful for renters, but follow the weight limits and apply them to clean dry surfaces. Let adhesive cure as directed before hanging anything wet. If a hook falls off twice, choose another storage method rather than reattaching it in the same bad spot.
Vertical storage should make the counter calmer. If it creates a wall of dangling tools above the sink, it may solve one problem while creating another. Use it sparingly.
Step 8: Decide What Can Stay Visible
Not everything visible is clutter. A sink area can include useful visible items if they are limited, clean, and intentional. The problem is visual sprawl: random bottles, mismatched packaging, damp towels, old sponges, and tools leaning in different directions.
A good rule is to keep only the active sink kit visible. If the organizer holds dish soap, sponge, and brush, that may be enough. If hand soap is needed, give it a defined spot. If a towel must be visible, hang it neatly where it dries. Everything else should be stored.
Avoid decorative extras around the sink unless the counter is large and the daily system is already stable. A plant, tray, candle, mug, or decorative bowl may look good at first, but if the sink area is already crowded, those items become obstacles. Function should come first because this is a wet work zone.
Packaging also affects how organized the area feels. A refillable pump can reduce visual noise from branded bottles. A matching or neutral towel can look calmer than several random cloths. But do not confuse aesthetics with function. A pretty dispenser that clogs, tips, or is hard to refill is not an upgrade.
The sink area should look ready to use. That means open counter space, dry tools, and clear access to the faucet. When visibility is limited to the items that truly belong there, the kitchen feels cleaner even before deep cleaning begins.
Step 9: Create A Sponge And Brush Replacement Rule
Even a perfectly organized sink can feel dirty if the tools are worn out. Sponges, scrub pads, and brushes need a replacement rule. Without one, they stay in use until they smell, fall apart, or become embarrassing.
The exact replacement timing depends on how often you cook, what you clean, and how well the tools dry between uses. Instead of relying only on the calendar, use condition checks. Replace a sponge if it smells after rinsing, stays slimy, breaks apart, changes texture, or has been used on a mess you do not want to carry forward. Replace a brush if the bristles bend flat, food stays trapped at the base, the handle cracks, or it no longer scrubs effectively.
Between replacements, rinse tools thoroughly after use and let them dry in the organizer. Do not leave a sponge sealed in a wet soap dish or under a pile of dishes. Do not store the brush bristles-down in standing water. Drying is part of cleanliness.
Keep backups under the sink, but do not open several at once. One active sponge and one backup are often enough. If five sponges are open at the same time, nobody knows which one is fresh. A clear replacement rule keeps the active kit simple.
This is also where the organizer matters. A sponge that has a defined draining spot is less likely to sit in a puddle. A brush that stands upright dries better than one buried behind the faucet. Better drying does not eliminate the need for replacement, but it helps tools last their useful life without making the sink feel stale.
Step 10: Build The Nightly Reset
The nightly reset is the habit that keeps the sink from returning to clutter. It should be short enough that people actually do it. Aim for sixty to ninety seconds, not a second round of kitchen cleaning.
First, return the daily tools to their homes. Sponge in the holder. Brush upright. Soap pump wiped if sticky. Towel hung. Drying mat lifted if it is no longer needed. Dish rack cleared if dishes are dry. This step resets the layout.
Second, remove standing water. Empty any small tray if your setup collects water. Wipe around the faucet base and counter edge. If water sits there overnight, it leaves marks and makes the area feel dirty the next morning.
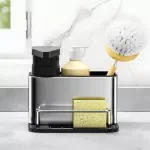
Third, rinse and wring the sponge or cloth. Do not leave it full of soap and food residue. If it smells or looks worn, move it out and start a fresh one. If the dish brush has food trapped in it, rinse the bristles before placing it back.
Fourth, check whether anything drifted into the sink zone that does not belong there. Mail, cups, food packaging, vitamins, keys, and random small items often land near the sink because people pass through the kitchen. Move them before they become part of the landscape.
The nightly reset works because clutter grows slowly. One bottle left out tonight invites one sponge, one towel, one mug, and one spray bottle by the end of the week. A short reset interrupts that pattern before it becomes a project.
Common Mistakes That Bring Clutter Back
The first mistake is buying an organizer before editing the items. If you keep too many tools, even a good organizer will overflow. Reduce first, then choose storage.
The second mistake is choosing a holder with no drainage. A closed tray may look neat but can keep tools wet. For sink items, drying is just as important as containment.
The third mistake is storing backups on the counter. Extra soap, extra sponges, and extra brushes are supplies, not active tools. Keep them under the sink or in a pantry area.
The fourth mistake is making the dish rack permanent when the counter is too small. If the rack is needed all day, keep it. If it is needed only after meals, choose a foldable or movable drying setup.
The fifth mistake is ignoring household behavior. If everyone naturally reaches to the right of the faucet, but the organizer is placed on the left for visual balance, the sponge will migrate back to the right. Put tools where hands actually go.
The sixth mistake is turning the sink into a decor shelf. Decorative items are fine in a kitchen, but the sink area is wet, active, and high traffic. Too much decoration reduces function and makes cleaning harder.
The seventh mistake is failing to maintain the under-sink cabinet. If backups are buried, the counter becomes storage again. A neat counter depends on reachable storage below.
Small-Sink Adjustments
Small sinks need stricter rules because there is less margin for clutter. Start by limiting the visible kit to the essentials: dish soap, sponge, and one brush if needed. Use a compact organizer rather than a wide tray. Store hand soap elsewhere if the kitchen layout allows it, or choose a single pump position that does not block the faucet.
Keep the drying zone flexible. A roll-up rack over one side of the sink, a foldable mat, or a small removable dish rack can work better than a large permanent rack. If clean dishes sit out for hours because there is nowhere to put them, the sink area will always look crowded. Build a routine for putting dry dishes away.
Use under-sink storage aggressively but simply. One bin for dish supplies, one for cleaning sprays, and one for trash bags may be enough. Avoid adding too many little containers because they can waste space and make the cabinet harder to use.
For towels, use a hook inside the cabinet door, on the side of a cabinet, or on the oven handle if that fits your kitchen. Do not let towels live in a wet pile by the faucet. In a small sink area, one damp towel can visually clutter the whole counter.
Small spaces reward consistency. If every item has one home and the nightly reset happens, the sink can feel functional even without much counter space.
Large-Sink Adjustments
Large sink areas have the opposite problem: they can hold too much. Because there is room, people leave more bottles, tools, and decorative items out. The counter may still look messy even though space is not tight.
Use zones to prevent sprawl. Keep the organizer close to the faucet. Keep the dirty landing zone clear. Keep the drying zone contained to one side. Do not let items spread across the full counter just because they can.
A larger sink may support both dish soap and hand soap, a drying rack, and a towel rail without crowding. But each visible item should still be intentional. If three cleaning sprays live by the sink because there is room, move them below. If decorative trays collect random items, remove them.
Large spaces also benefit from symmetry only after function is solved. It is fine if the organizer sits slightly off-center because that is where it works best. A balanced-looking counter that makes dishwashing awkward will not stay balanced for long.
The rule is simple: more space should mean easier movement, not more objects.
Apartment And Rental-Friendly Options
Renters often cannot drill into tile, cabinets, or walls. That does not prevent a better sink setup. Use freestanding organizers, removable adhesive hooks, over-cabinet towel bars, and bins under the sink. Choose solutions that can move with you and do not damage surfaces.
A compact organizer like #1790715 is rental-friendly because it sits on the counter and does not require installation. It gives the sponge, brush, and soap a home without attaching anything permanently. If adhesive hooks are allowed, use them for gloves or towels in low-stress areas. If adhesive hooks are risky, use an over-door hanger inside the cabinet.
Under-sink bins are also useful in rentals because cabinet layouts vary. Instead of building custom storage, use bins that can be pulled out and rearranged. Keep plumbing visible and avoid blocking shutoff valves.
If counter space is extremely limited, prioritize drainage over appearance. A small draining holder is better than a decorative tray that traps water. The sink area will look cleaner when tools are dry and contained, even if the setup is simple.
Family And Shared-Kitchen Rules
A sink organization system has to be obvious if more than one person uses the kitchen. If the rules exist only in one person's head, the area will drift back to clutter.
Make the daily kit visible and simple. One sponge spot. One brush spot. One soap pump. One towel place. If possible, avoid having multiple similar items that create choices. People are more likely to return a sponge to a clear holder than to choose between several trays, hooks, and cups.
Use labels inside cabinets if needed, especially for backup supplies. A small label for "sponges," "soap refills," or "dishwasher pods" can prevent duplicates from appearing on the counter. Labels are less about style and more about reducing questions.
Agree on the nightly reset trigger. It might be after dinner, after the dishwasher is loaded, or before the lights are turned off. The reset should be attached to an existing habit so it does not rely on memory.
For households with children, keep cleaning chemicals safely stored according to their labels and your household safety needs. Do not place sprays or pods where children can access them simply because it is convenient. Organization should support safety, not compromise it.
Final Recommendation
A clean sink area comes from a small number of good decisions repeated every day. Remove everything first. Choose a minimal daily kit. Give wet tools a draining home. Separate active tools from backup supplies. Design around how dishes actually move. Use under-sink storage for refills and occasional items. Add vertical storage only when it solves a real problem. Replace worn sponges and brushes before they make the area feel dirty again. End each day with a short reset.
For this article, the best matched product is the 3-in-1 Stainless Steel Kitchen Sink Organizer with Soap Dispenser, Sponge, and Brush Holder (#1790715). It supports the central routine because it gives dish soap, sponge, and brush one compact place to live while keeping wet tools organized and easier to dry. It should be treated as the anchor of the active sink kit, not as a container for every cleaning item in the kitchen.
The best sink setup is not the one with the most storage. It is the one where the right tools are visible, the wrong items are out of the way, and returning everything to its place takes less than a minute. When that happens, the sink stops being a clutter magnet and becomes a functional kitchen workstation.
Browse Kitchen Organization products